
How many Survival maps are in No More Room in Hell 2?
Three at 1.0: Flooded, Lighthouse, and Night of the Living Dead. Each has three points of interest with variation between holds.

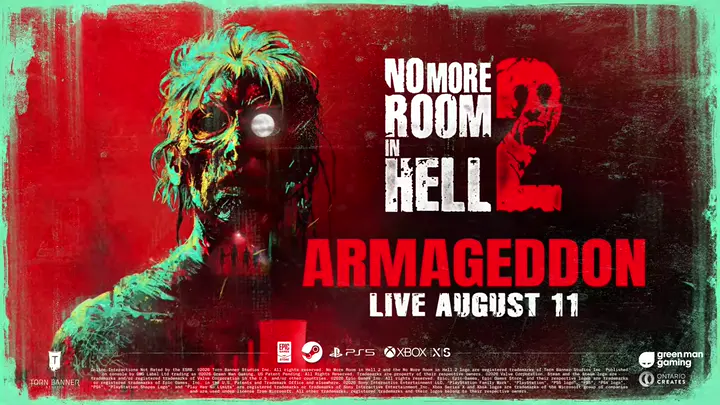
This No More Room in Hell 2 survival maps page is the speaker-wave sheet for Torn Banner Studios's 8-player extraction FPS: Flooded, Lighthouse, and Night of the Living Dead (NOTLD) are the three 1.0 Survival maps. Hold the speakers for three ~5-minute waves, take CRC airdrops between holds, then board the helicopter. Fail two waves and early extract opens. Solo Mode is a separate practice sandbox. Verified August 16, 2026 · Steam · Armageddon 1.0 notes.
| Fact | Detail |
|---|---|
| Platform | PC, PS5, Xbox Series X|S |
| Mode | 2–8 online co-op · Solo practice · Survival |
| 1.0 maps | Flooded · Lighthouse · Night of the Living Dead |
| Waves | Three holds · ~5 minutes each · defend the speakers |
| Between waves | CRC airdrop / supply drop · rotate to the next POI |
| Win extract | Helicopter after wave 3 |
| Fail extract | Two failed waves open early extract |
| Tools | Barricades · map traps · melee first, guns as a noise budget |
| Solo | Separate practice mode — no permadeath, no regular progression |
| Verified | August 16, 2026 · Armageddon 1.0 · August 11, 2026 |
Matched by build plan, shared topics, and guide progression — not random related links.

No More Room in Hell 2 survival maps are compact combat drops, not the scatter-spawn Objective chain. Official 1.0 copy: speakers attract waves of zombies away from population centers and into combat-focused Responders. You arrive with a few minutes to loot and prepare defenses around the first speaker set. A CRC supply drop is available in that prep window. Then the wave starts. Armageddon notes.
| Beat | What happens | Your job |
|---|---|---|
| Prep | Minutes before the first broadcast; first airdrop can land | Loot melee, boards, fuel, medical; barricade the speaker approaches |
| Wave (×3) | ~5 minutes of pressure on the speakers | Hold the broadcast. Traps and boards buy time; empty stamina loses the door |
| Between waves | CRC sends another supply drop; you rotate to the next POI | Reload, reboard, move. Do not farm a side shed while the next clock is live |
| Wave 3 success | The distraction works; a helicopter extracts you | Board the pad. Same loud-window rules as extract |
| Two failed waves | Early extraction opens as a disaster brake | Take it. A living Responder beats a third doomed hold |
The broadcast is why the horde walks into you. Official framing: protect the speakers as they broadcast. If the hold fails, you did not “almost extract” — you lost a wave. Two of those and the mode hands you the same character-save as Objective early extract. That is the whole Survival contract: three successful holds, or abort after two fails.
Official Road to 1.0 notes kept the three-wave structure and added time so the mode stays faster than Objective without becoming a throwaway. Each 1.0 Survival map has three points of interest with variation between them. You still earn match and meta progression on a real extract. You still lose the Responder on extract fail or full mission fail. Road to 1.0: Survival.
If you need the first-drop order before you touch a speaker, start on the beginner guide. The maps hub lists Objective routes next to this mode.
1.0 ships three No More Room in Hell 2 survival maps. Queue the hold you can read, not the name that sounds cinematic. Official settings: Flooded is a storm-hit industrial complex, Lighthouse is a cliff beacon plus neighborhood and construction, Night of the Living Dead is the farmstead. Welcome notes.
| Map | Setting | Hold problem | Watch for |
|---|---|---|---|
| Flooded | Rural Pennsylvania industrial · multi-floor buildings, cargo containers, abandoned machinery, groundwater | Water hides downed zombies; dry loot spots are rare | Confirm kills before you turn your back; do not share a bag in knee-deep water |
| Lighthouse | Coastal cliff beacon · tight lighthouse interiors, small neighborhood, abandoned construction | Back-to-the-wall holds; stairs and rooms that become tombs | Do not stack eight people in the tower; use the community and construction for tools and space |
| Night of the Living Dead | Rural farmstead · farmhouse, guest house, barn | Three POIs, three hold shapes — claustrophobic house, open guest house, long barn | Fuel traps and board the house; the barn has few built-in defenses |
Flooded punishes sloppy melee because bodies disappear under water. Lighthouse punishes a stacked tower because one grab on the stairs deletes the rotation. Night of the Living Dead punishes a squad that treats all three POIs like the same farmhouse. If the roster is new, hold Flooded or the guest-house beat on NOTLD after one Objective extract — not Nightmare Lighthouse on a shop loadout.
Power Plant, Broadway, Hospital, and the rest of the maps list are CRC task chains with a loud final window. Survival is speaker waves on a compact layout. Do not bring an Objective loot-sprint into a five-minute hold. Do not bring a Survival mag-dump into a stealth Objective start.
Flooded is the industrial Survival map. Official 1.0 copy: a storm-hit complex in rural Pennsylvania with multi-floor buildings, ransacked cargo containers, and abandoned machinery. Groundwater covers the map. Zombies are harder to confirm as slain, and dry spots to share loot are rare. Armageddon notes.
| Beat | Do this | Do not |
|---|---|---|
| Prep | Loot containers and upper floors first; board speaker approaches on dry ground | Stand in water to sort a bag while Walkers are still twitching |
| Wave | Shove, step, then swing — melee. Re-check downed bodies after each push | Assume a splash is a dead zombie and turn your back |
| Airdrop | Pull the crate to a dry interior before you split ammo | Open the drop in the flood while the next clock is already counting |
| Rotate | Move as a group; water plus split loot is how a grab lands unseen | Solo a container row “for one more gun” |
Official copy is blunt: groundwater makes confirming kills and sharing loot harder. A Walker that looks downed in the flood can still grab. Treat every splash as live until you see a dry, still body or a dismember you trust. That is why Flooded sits next to the melee page — Charged swings into murky water on an empty stamina bar are how Flooded deletes slots.
Ping a dry interior as the loot table. Pass Phalanx and boards there, not in the flood. If someone is already coughing, do not make them kneel in water to take a bottle — get them onto a floor, then path to extract if the kit is gone. Flooded is still permadeath. The water does not make the slot cheaper.
Lighthouse is the coastal Survival map. Official 1.0 copy: a beacon atop a cliffside where you fight with your back against the wall. A small neighborhood and abandoned construction offer tools beyond the lighthouse itself. The tower is filled with tight spaces that can lead to quick deaths. Armageddon notes.
| Area | What it is for | Fail state |
|---|---|---|
| Lighthouse interior | Vertical hold, short sightlines, one-way stairs | Eight Responders stacked in the tower — one grab jams the exit |
| Neighborhood | Loot, boards, extra rooms, a second angle on the approach | Treating houses as a side farm while the speaker is already live |
| Abandoned construction | Tools, space, longer sightlines than the tower | Wandering the site alone during a wave |
| Cliff / back wall | The map’s shape — you will run out of retreat | Kiting off the hold “to reset” and never making it back to the speaker |
The lighthouse is the postcard, not the whole hold. Official copy gives you the neighborhood and construction for a reason. Assign two people to the tight stairs and the rest to the approaches. A Charged swing in a spiral stair on a red stamina bar is a bite. Shove first. If the speaker is outside the tower, do not hide in the lamp room and call it defense.
You cannot kite a failed Lighthouse hold across a Power Plant. When the second wave is already lost, open early extract instead of climbing for a better angle. The helicopter after wave 3 is the win; two fails is the same disaster brake as every other Survival map. Details live on extract.
Night of the Living Dead (NOTLD) is the farmstead Survival map. Official Road to 1.0 copy: the farmhouse remains the heart — three floors, zombies from all directions, traps if you can fuel them, boards to control flow. 1.0 expands the hold to the guest house and the barn so you protect the whole farmstead, not one kitchen. Survival & NOTLD.
| POI | Official shape | How you hold it |
|---|---|---|
| Farmhouse | Three floors, claustrophobic halls and stairs, multi-direction entries | Board windows and stairs; fuel traps; do not lose the ground floor and call the attic a win |
| Guest house | Flatter, open floorplan, several exterior doors and windows, garage tools, cellar | Fight as one unit with backs to the speaker; watch the cellar — undead and Responders both use it |
| Barn | Largest interior, long sightlines, lofts, few built-in defenses, farm structures as cover outside | Bring your own boards and explosives; loft shooters still need a ground pair |
The house wants boards and fueled traps. The guest house wants a squad that can see every door at once. The barn wants reach melee plus a gun you can actually feed, because official copy says defenses there are thin. Do not spend the only Molotov on the farmhouse hallway if the next rotate is the barn. Official notes also say 1.0 tuned spawning, difficulty pressure, and loot split between the map and supply drops — treat the airdrop as part of the hold, not a bonus crate you open after the wave is already dying.
NOTLD is the cinematic farmhouse. It is still three ~5-minute speaker waves and a helicopter. Fail two waves and early extract opens. Do not stay for “one more classic last stand” on a Responder with Expert skills. The beginner guide is where you learn to leave; this page is where you leave on a farm.
No. Solo Mode is a separate 1.0 sandbox. Official Armageddon copy: Solo exists to learn each map, improve at objectives or combat, or test a kitted Responder. It has no traditional progression and zero permadeath risk. Survival is a real match with speakers, airdrops, a helicopter, and a deleted slot if you fail the extract. Armageddon notes.
| Mode | What you practice | What you keep |
|---|---|---|
| Survival (multiplayer) | Three speaker waves on Flooded, Lighthouse, or NOTLD | Match / meta progression on a real extract; permadeath is on |
| Solo Mode | Maps, combat, builds, trap and barricade timing | Nothing regular — no XP / Credits farm, no permadeath |
| Tutorial | Melee, guns, objective trials, inventory | Comfort. Then Solo or Beginner Objective, not Nightmare Survival |
| Beginner Objective | First real extract on a large map | The Responder if you board — beginner guide |
Use Solo to walk Flooded water, Lighthouse stairs, and the NOTLD farmhouse–guest house–barn rotate without deleting a character. Practice the swallow on pills and the shove-then-swing on a door. Then queue Survival with other players. Solo is not “offline Survival with rewards.” Official copy stripped regular progression so it cannot be an exploit.
A 2–8 private Survival drop is still Survival: speakers, waves, permadeath. Solo is the labeled practice mode. If the HUD still talks about character loss, you are not in the sandbox. Confirm the mode before you bring the expensive loadout.
Scan this before you queue a speaker map. Most deleted slots are process errors: skipping prep, treating Solo as a farm, or ignoring the two-fail extract.
| Mistake | Fix |
|---|---|
| Starting the wave with no boards | Prep minutes exist for a reason — barricade before the broadcast |
| Spending traps on prep Walkers | Fuel and explosives are for the five-minute hold |
| Empty-stamina Charged on a speaker door | Shove, recover, then swing — melee |
| Ignoring Flooded water | Re-confirm downed zombies; loot on dry ground |
| Stacking the Lighthouse tower | Split to neighborhood and construction; keep a stair pair, not eight bodies |
| Treating NOTLD as one farmhouse | House, guest house, and barn are three different holds |
| Third wave after two fails | Early extract is the brake — extract |
| Boarding collapsing | Infected extract only works if you still control the character |
| Queuing Survival as the first drop | Tutorial → Solo → Beginner Objective — beginner guide |
| Treating Solo as XP | Solo has no regular progression and no permadeath — drill, then leave |
Prep the speaker, hold the five minutes, take the airdrop, rotate. After two failed waves, extract. That is the whole No More Room in Hell 2 survival maps loop. The maps hub is the directory; this page is the hold.
Three at 1.0: Flooded, Lighthouse, and Night of the Living Dead. Each has three points of interest with variation between holds.
Prep and barricade the speakers, then hold three waves of about five minutes each. CRC airdrops land between waves. A helicopter extracts you after wave 3.
Early extraction opens so you can leave before a disaster. Take it. A living Responder beats a third doomed hold. See extract.
Yes, on a real Survival match. Extract fail and full mission fail can delete the slot. Solo Mode is the exception: no permadeath and no regular progression.
No. Solo is a separate practice sandbox for maps, combat, and builds. Survival is the speaker-wave mode with airdrops, heli extract, and permadeath.
The industrial Survival map: storm-hit Pennsylvania complex, multi-floor buildings, cargo containers, machinery, and groundwater that hides downed zombies.
The coastal Survival map: cliff beacon, tight interiors, a small neighborhood, and abandoned construction. Back-to-the-wall holds; do not stack the tower.
The farmstead Survival map (NOTLD): farmhouse, guest house, and barn. Classic hold expanded to the whole farm. Fuel traps and board the house.
The extract abort sheet, the melee shove-then-swing loop, the beginner guide first-drop order, then the maps directory.
August 16, 2026
Matched by build plan, shared topics, and guide progression — not random related links.